Friday, December 15, 2006

Winter BBQ Contest in New England - NE BBQ Society


Hey fellow BBQ fans and GrillJunkies!


We thought you'd find this interesting. Announced this afternoon, December 15th, 2006, the New England Barbecue Society is sanctioning a Winter BBQ via the 1st Annual Winter Sizzler Barbecue Competition January 13th and 14th 2007.


The New England Barbecue Society in conjunction with Porky's BBQ Productions and the Inn Season Resorts, will host this one of a kind event.


Professional barbecuers from across New England will compete against each other and Mother Nature in the categories of Chicken, Pork Ribs, Boston Butt, Beef Brisket and Chili. This event will be held at the Inn Season Resorts in Lincoln NH where temperatures are expected to reach a high of 25 degrees and a low of 5 degrees. Teams will compete using Kansas City Barbeque Society Guidelines. The rules can be found at www.kcbs.us.


Teams will arrive on Saturday and cook through the night. Judging begins on Sunday at 12:00 p.m. starting with chicken, 12:30 Pork Ribs, 1:00 Boston Butt, 1:30 Beef Brisket and 2:00 Chili.


Teams must battle each other and the weather to win this event. To our knowledge there is no other contest like this in the United States. Most if not all Barbecue contests take place in much milder weather conditions. Come and watch our New England teams battle for the title of World's Toughest Barbecue Champion and witness the spectacle of smoke rising above the snowy slopes of Lincoln NH.


Learn more... -http://www.nebs.org/

Monday, December 11, 2006

Survey: Charcoal vs. Gas Grilling?


The GrillJunkie Team's tagline is "What Fire's You Up?", so we thought it very fitting to perform a survey in order to actually answer this important question. With that said, we'd like to hear from you.


What Fires You Up? When grilling do you prefer to use:


1) Charcoal

2) Gas - inclusive of Propane and Gas


3) and why?


We'd love to hear from you. You can send your response via the blog comments or directly to our email address at info@grilljunkie.com


We will follow up with the results, and continue the debate with a related survey including bbq vs. grilling.


What Fires You Up?


The GrillJunkie Team


Grilling Basics - Top 10 Rules


Grilling 101 - The GrillJunkie Basics and Top 10 Rules:

For more tips, recipes, and products....Visit us online at http://www.grilljunkie.com

Grilling like any other kind of cooking is a combination of technique and art. Grilling refers to foods that are cooked more quickly and directly over high heat. The fuel and heat source are not separated from the cooking chamber thus providing for an environment that provides for high heat. Grilling temperatures typically reach 500°F or more, but any temperature above 300°F is considered a grilling temperature. The high heat of grilling sears the surface of meat, creating a flavorful browned crust.

The difference between grilling and cooking on the stove or in the oven is that grilling is, in essence, is a combination of both. A grill provides direct heat from the gas burners or the charcoal and indirect heat that fills the grill when the lid is down. An average gas or charcoal grill can reach 500 degrees in a matter of minutes. Unlike with an oven, where you can simply place the food inside, set the temperature and timer, and walk away for a while, while grilling you must remain ever engaged, proactive, and vigilant.

The high heat, both direct and indirect is the foundation of grilling.

You will want to leverage this heat to cook food, quickly. And due to this fact, foods cook fast on a grill you have to turn them in order to cook them evenly, without burning. However, this is where practice, experience, and the art of grilling come in, because if you turn things too often you will slow the process of cooking and this can lead to food that is tough and dry. The secret is turning only when necessary. When cooking a steak or a hamburger, and checking it for desired doneness, be sure to get down low, by the edge of the grill, be ever-careful not to burn yourself. Gently lift up the corner of the meat. When the lines from the cooking grate start to turn black it's time to turn the food.

Knowing when to turn and when things are cooked involved practice, experience, and is in essence, the whole art of grilling. The rest of it, like indoor cooking and baking, is recipes, marinades, and trick. Everything else is recipes, marinades, and tricks. The art of grilling is also the hardest thing to teach, and must be accompanied by practice and experience. You will not be able to learn the art of grilling simply be reading, you must take what you read and practice, make mistakes, experiment, and experience! As an example, ideally, a steak will be turned only once, however, if the steak is very thick (more than about 1 1/2 inches) you might need to do it three times to get it cooked through to the center.

Like with all things that take time to learn and require practice and patience, you must, start simple when learning the art of grilling. Keep those first few steaks a little on the thin side, and once well practiced move up to a filet mignon. This will help you get the hang of grilling and allow you to properly cook food with more enjoyment, and without a lot of trouble. As you evolve as a GrillJunkie, and become more experienced with the art of grilling, you can work up to more challenging techniques and dishes.

Here are a few rules of good grilling.

Rule 1: Always keep your grill clean. This is an essential for good tasting food and safety!

Rule 2: Always keep a close eye on what you’re grilling. Be proactive, watchful, and in control.

Rule 3: Always keep your grill in a safe location away from anything flammable like lighter fluid, fences, your house, etc.

Rule 4: When grilling low fat meats and other foods that stick, use oil or cooking spray on the grill grate However, never apply cooking spray to a lit grill.

Rule 5: Do not use spray bottles of water to control flare-ups. Flare-ups are caused by too much fat and too much heat. Trim excess fat and when you turn meat on the grill move it to a different part of the grill.

Rule 6: Do not add oil-based sauces, or marinades to meat on the grill. This inevitably causes burning.

Rule 7: Always allow yourself plenty of time to prepare and cook. Don't leave your family and/or guests waiting.

Rule 8: Spice up your food a good hour or two before you hi the grill. This time allows the flavor sink in.

Rule 9: Use the proper grilling tools. Using anything else, such as a table fork, which is good for eating, are not so good or safe for grilling.

Rule 10: Always be sure to plan for and make more than enough food for everyone including unexpected guests. The last thing you will need is an angry mob on your hands.

Visit our site for more tips, recipes, and help celebrate America's love of grilling with our unique line of aprons, t-shirts, beer steins, etc.!!

http://www.grilljunkie.com

Thursday, November 16, 2006

Looking for BBQ Sauces, Rubs, Fiery Foods?


As we prepare for Thanksgiving here at GrillJunkie (yes we will infact be grilling the turkey - be sure to read the previous blog), we wanted to introduce you to our new friends at The Ugly Pug Trading Company.

If you are looking for gourmet BBQ sauces, hot sauces, & Fiery Foods look no further! Their specialty products include BBQ sauces. They have a great selection of hot and spicy salsas, hot sauces, not so hot sauces and super hot sauces, wing sauces, marinades, rubs, seasonings, condiments and many other spicy treats.

And don't forget to check out their blog as well!

Happy Thankgiving to all!

The GrillJunkie Team

Wednesday, November 01, 2006

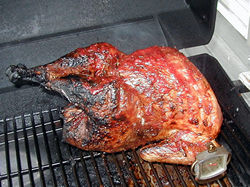
Grilling a Turkey for the Holidays!


Grill that Turkey!!!

Purists beware. You may not like what you are about to read about the traditional Thanksgiving Turkey. It is the GrillJunkie team's belief that while oven roasting a turkey gets it cooked, grilling that bird results in a turkey that is cooked with flavor. We also recommend smoking and frying your bird as alternatives but that's a blog for another day.

Turkey is significantly more flavorful if grilled. We encourage you to try this flavorful method this holiday season. The related key is to brine your bird first. Brining gives extra moisture to the turkey so it won’t dry out during cooking whether you grill, smoke, or deep fry your bird.

To properly brine a turkey you need to start the night before you plan to cook and serve your meal. You will need at least 10 to 12 hours set aside, a large enough container to hold your turkey and enough brine to cover it. Also, don't forget salt, water, seasonings, and enough room to refrigerate it. A large stock pot, large oven roaster, or a 5-8 gallon, clean plastic bucket would make perfect containers. The key to determining the container size that you choose is determined by the need to have enough room to allow the turkey to be turned so it should be big.

Now on to the fun part. The turkey must be cleaned out and completely thawed. It is important to note that the turkey should not be a self-basting or Kosher turkey. Self-basting and Kosher turkeys have a salty stock added that will make the turkey too salty.

Making the Brine

To make the brine, use a ratio of 1 cup of iodine-free salt to1 gallon of very clean, very fresh, chlorine free water. You will need more than 1 gallon of water but that’s the ratio for which to aim. Ensure that the salt is completely dissolved before adding the seasonings you like, making sure not to add anything that contains extra salt. Brines can be spicy hot with peppers and cayenne, savory with herbs and garlic, or sweet with molasses, honey and brown sugar. Whatever your tastes are, you can find a large number of brine recipes out there. We recommend visiting Derrick Riches site on about.com as he has listed a gamut of brining recipes. http://bbq.about.com/od/brinerecipes/r/bl90821a.htm

Carefully place the turkey in a container and pour in enough brine to completely cover the turkey with a few inches covering the top of the turkey. It is important to not have any part of the turkey above the surface of the brine. Next place the container, turkey, brine and all in the refrigerator. The turkey should sit in the brine for at least 10 hours but not more than 24! Brining for too long will destroy the flavor. If you are using a smaller than 10 pound turkey, cut down on the brining time or reduce the amount of salt in the brine.

When you are ready to start cooking, remove the turkey from the brine and rinse it off in the sink with cold water until all traces of salt are off the surface. Discard the brine and cook your turkey per your choice of cooking methods. Again, this is where we may lose the purists as we highly recommend grilling your turkey!


The Basics:
There are a lot of factors that can influence how your turkey is going to turn out, so paying attention to the basics is very important. First of all, since you will be grilling indirectly with a low fire the weather plays a significant role, especially in Autumn and Winter. Although a cold temperature plays a role, the most important weather condition to watch out for is wind. Wind robs heat from outdoor cooking appliances, and due to its very nature comes and goes in wisps as opposed to a steady temperature, so watch your grill temperature closely.

Also, the choice between the use of charcoal or gas makes a big difference. As a rule of thumb, gas will be easier. All in all, depending on what you own, or what you prefer to grill with, be ready for the variables.

To begin, you will need to create an indirect fire that will hold a steady temperature in the 300 to 350 degrees F. range. This is where the power of a gas grill comes into play. If the weather isn't going to cooperate we strongly recommend gas, simply due to the fact that you can control the temperature much easier.

What you need to get started:

  • First you will need a fresh or completely thawed turkey, and it must be brined as we discussed previously. We recommend a 12 pounder, and to stay away from anything over 15 pounds as the larger bird may burn on the outside before the inside can get cooked.
  • We also recommend a V-shaped roasting rack to support the turkey and keep the turkey from moving around too much. This rack should be sturdy because it won't have a solid surface upon which to sit.
  • We also suggest an oven thermometer. This important tool will help monitor the grill temperature when you open the grill.
  • You may also want a smoke source. Get some wood chips for the gas grill or chunks for the charcoal grill. Try a fruit wood like cherry or apple, or use oak or hickory.
  • Also, you need a good meat thermometer.
  • Most importantly you will need plenty of fuel. If you are using a gas grill you will surely need an extra, full tank on hand. If you are using charcoal, make sure you have plenty on hand and that you have a way of lighting additional coals for the fire outside of the grill. A charcoal chimney starter will help here and is a must if you use charcoal.
  • It is important to have something to catch the drippings from the cooking turkey. You can use the drippings for making a sauce and the prevention of the drippings will help save your patio or driveway from unwanted stains. We recommend a shallow roasting pan to catch the drippings.
  • You will also need time. Since you will be grilling your turkey at about the same temperature you would in an oven you will need about the same amount of time to get your turkey done. Remember that grilling isn’t as exact as oven roasting so times will vary. Make sure you can adjust for that.

    Step by step grilling instructions:
    Step 1: Clean and Prepare Your Bird!- Prepare the turkey. This means removing everything from the body cavity, taking out any pop-up plastic timer devices and giving it a good wash in cold water. Pat dry. Do not bother with tying up or "trussing" the bird. Trussing will only slow down the cooking of the thighs which you want to actually cook more than the rest of the bird.

    Step 2: Season, or Brine the Bird! Season or brine the turkey as desired. See the brining section above. Remember if you do use a brine, be sure to rinse off any salt from the bird before you grill it.

    Step 3: Prepare Your Grill! When the time comes, prepare the grill. Remember that you will be grilling a large bird indirectly, using the indirect heating method. See our Facts and Recipes section at for the basics on indirect grilling. http://www.grilljunkie.com/funfacts.html It is a good idea to take the turkey out to the grill before you light it to see about spacing and heating. This is especially important if you are using charcoal. With charcoal you will want to make sure that you build the fire up in the right place so as not to have the hot coals directly underneath the bird. If the bird is too close then one side could cook too fast. You will want a drip pan under the turkey to prevent flare-ups, to catch and save the drippings, and to prevent drippings from staining those expensive patio bricks or your driveway. Be sure to add add water to this pan periodically to maintain a moist environment in the grill and to keep the drippings from burning away. You can make great gravy from the drippings!!

    Step 4: Gas or Charcoal?! If you are set up for indirect grilling, using your rotisserie will be pretty easy. You just need to keep a tight eye on your bird to ensure that the skin isn’t burning and that heat is getting into the bird. If you are not using a rotisserie and you are on a gas grill set the turkey, breast side down on a well oiled grate or v-shaped roasting rack. If your grill allows you to turn the heat on and/or off on either side with multiple burner controls on the opposite side of where you place the turkey then you will have an even heating area and you will only need to worry about turning the turkey in about an hour.

    If you are using a charcoal grill you want the coals in either a ring around the turkey or banked on either side of it. You want even heating so one side doesn’t cook faster than the other. Regardless of the grill being gas or charcoal, try to keep the turkey away from the very edges of the cooking surface so that heat can flow around it.

    Step 5: Set Your Temperature! You are shooting for cooking temperature of around 325 degrees F. If you have an oven thermometer in the grill, set it close to the bird because this is the area you are most concerned with. If you are using a gas grill make the necessary adjustments to the control valves to hit your target temperature. If you are using charcoal you will want to keep a close eye on the temperature to keep it in the right range. Add additional burning coals as necessary.

    Step 6: Turn Your Bird! Depending on the set up or arrangement of your grill you will need to turn or flip the bird during the cooking time. If you have a dual burner gas grill you will need to rotate the bird after about 30 minutes, flip and rotate 30 minutes after that and rotate after another 30 minutes. This keeps the hottest part of the grill from burning one part of the bird. You will need to continue this rotation until the turkey is done. If you are set up to have heat all around the turkey or on two sides of it then you will need to rotate the turkey after about an hour. Of course this really depends on how fast the turkey’s skin is cooking. You don’t want the outside to cook too much faster than the inside. Use a meat thermometer to monitor the internal temperature. If the skin is getting too browned before the inside starts warming up, your cooking temperature is too high.

    Step 7: Check Your Bird's Temp! After a about 2 hours you want to start testing the internal temperature of your grilled bird!. Your target temperature is 165 degrees F. even at the coldest part of the turkey since you need every little morsel of meat at or above this temperature. Be sure to test in several places, but be patient and wait for the temperature to record properly, so don’t start poking your bird full of holes. As a rule of thumb, the internal temperature of a bird should only rise about 10 degrees every 15 to 20 minutes from start to finish using the grill temparature of 325 degrees F

    Step 8: Remove and Rest Your Bird! Remove the turkey from the grill and let it rest for about 10 to 15 minutes before carving. The resting period allows the juices to flow back into the meat and creates the perfect texture for carving and eating.

    Step 9: Carve and Serve! Carve your bird. You will notice the second you start to carve your turkey that the brining has helped it retain moisture. The first bite will sell you on brining and grilling turkeys forever, and after you've tried this you will want to brine all your poultry. Serve, and eat!

    Step 10: Enjoy your Friends and Family! - Celebrate what has been given to us and the freedom we have to celebrate our healthy addiction to grilling!

Tuesday, October 31, 2006

Grilled Fruit!


Grilled Flaming Pineapple

A true Grilling Junkie delight, and a new trend these days is to grill fruit on the trusted backyard grill. You trusted us with Grilled Pizza right? Trust us on this one too!

One of our favorites is Grilled Pineapple. Pineapple has the ideal texture and substance to take the heat of the grill! To add more fun to the experience, be sure let everyone gather around when you are ready to throw these pineapple slices on the grill. As always, be careful..when the rum hits the fire it will flare-up, so keep your your cool and your eyebrows out of range and let everyone be awed by your grilling skills.

INGREDIENTS:

1 pineapple cored and cut into ½ inch slices
1/2 cup Worcestershire sauce
1/2 cup honey
1/2 cup (or 1 stick) butter or margarine
1/2 cup packed light brown sugar
1/2 cup dark rum
Scoop of Vanilla ice cream

PREPARATION:

Combine Worcestershire sauce, honey, butter, sugar and rum in a deep medium saucepan. Bring mixture to a boil, making sure to stir constantly so as to avoid burning the mixture. Once it reaches a boil, reduce heat and simmer for about 10 minutes or until it begins to thicken. Remove from heat and allow the sauce to cool.

Preheat and oil your grill (a light olive oil works best). Brush pineapple pieces with sauce and place on grill. Cook for about 5 minutes turning occasionally. Surface of the pineapple should brown. Remove from grill, top with ice cream and the remaining sauce.

Enjoy!

The GrillJunkie Team

Celebrate Your Addiction to Grilling!


For those of you who are interested in expressing your love and/or addiction to grilling and barbeque, let it be known that we also design and sell a line of aprons. t-shirts, beer steins, etc. with such sayings as:


  • "GrillJunkie - What Fire's You Up?",
  • "Fire Good",
  • "King of the Grill",
  • "Live and Let Grill",
  • "got buns?"
  • .......... and many more!

    In conjunction with CafePress, these products can easily be ordered and shipped to you or to your favorite GrillJunkie of choice. These products make great gift ideas for Birthdays, Summer celebrations, Christmas, Father's Day, Mother's Day, Labor Day and any special occassion.

    What you see above is just a one example of the grilling apparel that we design. Be sure to visit our site to view the entire product line, as well as gain accesss to our free grilling tips and recipes.

http://www.grilljunkie.com/

http://www.cafepress.com/grilljunkie

Sunday, October 29, 2006

Halloween Grilling Anyone?

This post comes from Derrick Riches from About.com. We thought it was worth posting as it fits in with our GrillJunkie theme that the grill is never not fired up. As we approach Winter, we always seem to focus in on the next holiday to make up an excuse to fire up the grill. As summer has ended, Labor Day and Columbus Day are behind us, our thoughts are usually focued on Thanksgiving and possibly grilling, smoking or deep frying the turkey outside. However, don't overlook Halloween as an excuse to fire up the grill and get some real food in them before they fill themselves with candy!


Original article from Derrick Riches -
http://bbq.about.com/

You might think of Halloween as little more than an excuse for the kids to fill themselves up on candy, but it’s a good idea to get some real food in them before the bags of candy start being replaced with bags of empty wrappers. Believe it or not the grill is a great way to put together something hot and satisfying, quick and easily. So consider a fun family meal of grilled foods before or after the kids hit the streets.

Of course hamburgers are a favorite of the grill and children, but think outside the bun and try making up some great Halloween pizzas. If you use cheddar cheese instead of mozzarella you get a pumpkin face for the kinds to decorate with black olives, pepperoni, red, orange and green bell peppers or whatever else you like on a pizza.

They’ll have a blast topping their own pizzas and since they cook up in a few minutes, they won’t drive you crazy waiting to eat.

Anything finger food is particularly good for Halloween since the kids will be coming and going during the night. It’s also perfect for the parents out escorting the young ones. Whether you’re having a big Halloween party or not, little grilled treats like buffalo wings or yakitori are perfect little treats to carry around the whole evening.

To top off your Halloween gathering you must have a Witch's Cauldron of Punch, Chocolate Spiders and Chocolate Covered Mice. So flame on the grill and have a safe and scary Halloween.

Source : http://bbq.about.com/

Monday, October 23, 2006

Weber's Command of the Grill - A Salute to Steak and our Marines!


Heads up fellow GrillJunkie's! Nudged by our Marine friends at The Bit Bucket blog, http://msthenetworker.blogspot.com/ we wanted to help promote the long awaited release of Weber's Command of the Grill - A Salute to Steak. This is no ordinary cook book! This book is the result of grilling competitions held for Marines. A great way to celebrate your passion for grilling, and to help our beloved Marines. Go ahead, find out more about what fires our Marines up.

http://www.commandofthegrill.com/


In 2005, active duty and reserve Marines at 10 military installations around the country took up their tongs in the ultimate battle of the barbecue. They marinated, seared, and sauced in an all-out battle for top grilling honors. This book showcases the winning recipes from the competition, along with steak recipes from famous former Marines like Lee Trevino and Ed McMahon.

This unique book combines the love of grilling steak, while unveiling a unique perspective on our Marine's favorite pastime! What could be better than a book that combines all of those, you ask? Well, Weber has designated that every single penny of this $10 book goes to supporting Marines wounded in action, or the families and children of Marines who were killed in action. The Charities supported are:


- The Injured Marines Semper Fi Fund - Provides financial assistance to injured Marines, and other service members injured while assigned to Marine Units.

- The Wounded Warrior Project - Provides programs and assistance to severely wounded service members.

- The Fisher House - Provides a home away from home for the families of patients receiving medical treatment at Military and VA medical centers.

- The Marine Corps - Law Enforcement Foundation - Assists the Children of Marines and Law Enforcement who were killed while serving their country.

If you know a Marine, buy this book for them, if you know someone who likes to grill, buy this book for them. Heck, buy one for yourself. Give something for those who sacrificed everything.

Be sure to visit the Weber site, where you can read more about the book, the story behind the book, and the charities!

http://www.commandofthegrill.com/

From the entire GrillJunkie Team, we wish to thank and send our admiration to Weber for honoring and supporting our Marine's

Semper Fi!

Friday, October 13, 2006

Winter Grill Cleanup and Prep

Winter Cleaning and Prep

Get your grill ready for winter.

As winter approaches each year, some of you may begin to think it's time to pack your grill away until signs of spring appear. There are a few things that should be done besides simply forgetting and just letting your grill sit under a foot of snow all winter. Of course that’s not what anyone plans on doing, however due to the quick onset of winter, especially in the Northeast, it frequently happens that way. The following will help you prepare your grill for winter and avoid finding your trusty barbecue rusted and populated with squirrels and field mice next spring.

To those of you in warmer climates, we offer you the best of wishes during those mid January cookouts. Be sure to send pictures to encourage the rest of us GrillJunkies that hope is just around the “seasonal” corner. Those of you that live in lands of snow however are presented with a choice. You can pack the grill carefully into a nice dry corner of the garage or shed, or face potential frostbite by cooking outdoors in a foot of snowfall.

After a long summer of grilling you probably have a good build up of black, greasy gunk in your grill. This gunk should be removed prior to winter storage. You will be glad you did come spring when that ad hoc cookout request comes along. In order to do so, we recommend that you follow the procedures in our Cleaning Your Grill section on our web site www.grilljunkie.com . In addition to cleanup, you should also make note of any part that is rusted through and is in need of replacement. It is always safe to assume that you may not be able to find those parts in the off season but you will know exactly what you need when the stores roll out their barbecue and grilling accessories selection next year.

With the shell and all the components clean you can reassemble the grill, being sure that all gas connections are made you are leak free. Then Fire It Up one last time to make sure that it is completely dry. Now you can go over the metal parts with some cooking oil or spray. This little trick helps to repel any moisture that might build up during the winter. Now you should cover your grill and park it in a place where it will be sheltered from the elements. An important note about gas grills is that while a dry corner of the garage is the perfect place for the grill, it is not the place for the gas tank!. Never store propane tanks in an enclosed area. Even the slowest of leaks can flood an area with explosive gas. It's best to keep the tank in a well ventilated area, protected from the weather.

If you have a charcoal grill the same basic rules apply. But because of the simplicity of a charcoal grill, you’ll have a much easier time of it. Charcoal grills and smokers tend to only need a light coat of oil over the cooking grates and don’t need to be oiled down like a gas grill. When spring arrives always let your grill or smoker heat up completely before you cook. This will burn off this protective oil covering.

Be safe, be clean, and be prepared. Enjoy!

Thursday, August 31, 2006

What Fires You Up? Grilling vs. BBQ

Here's a snippet from the GrillJunkie FAQ section of our site www.grilljunkie.com to get things started:


What Fires You Up?
Grilling versus Barbeque

We would be remiss if we did not first address the age old question regarding the differences between Grilling and Barbeque. In essence, what we are attempting to explain here is the difference between grilling and barbeque, or, as many refer to as the direct versus indirect method, while attempting to avoid taking a side amongst the purists of the two camps. At GrillJunkie we encourage the practice and experimentation of both methods, …..again fortifying our motto, “Whatever Fires You Up!”

People often use the term barbecue when referring to foods that are grilled, but barbecuing and grilling are two very different processes.

Barbecuing

Barbecuing refers to foods that are cooked with a long, slow process using indirect, low-heat generated by smoldering logs, wood chips that smoke-cook the food. The fuel and heat source are separated from the cooking chamber, but the cooking chamber contains enough heat to slowly but properly cook the food over a long period of time. Along with heat, the cooking chamber fills with smokes, providing the food with its characteristically smoky flavor, which varies depending on the type of wood that is used for the fuel. The best temperature for barbecuing is between 200°F and 300°F. If the temperature rises above 300°F, it is considered grilling.

Grilling

Grilling refers to foods that are cooked more quickly and directly over high heat. The fuel and heat source are not separated from the cooking chamber thus providing for an environment that provides for high heat.

Grilling temperatures typically reach 500°F or more, but any temperature above 300°F is considered a grilling temperature.

The high heat of grilling sears the surface of meat, creating a flavorful browned crust.

More to come next post where we'll share a few recipes and continue the BBQ vs. Grilling theme by delving into Indirect vs. Direct Grilling.

Can't wait? ...... Visit our site at www.grilljunkie.com

GrillJunkie's Unite!


Greeting to all!

The GrillJunkie's Unite site is a blog that focuses on what’s happening in the grilling world, locally and nationally. Here you will find recipes, grilling tips and FAQs, restaurant reviews, book reviews, products to help celebrate your addiction to grilling and BBQ and other useful information on the grilling and BBQ scene.


Visit our main site at http://www.grilljunkie.com